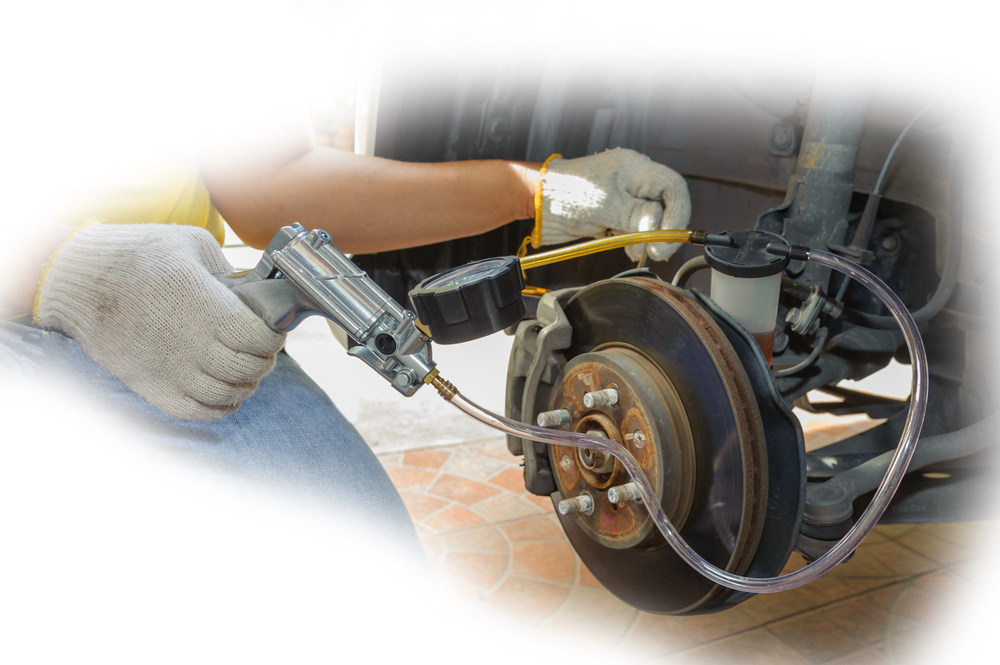
Drivers can experience loss of braking efficiency in different ways: overheating, brake discharge and brake pad deterioration to name a few. 'Steam throttling' and 'spongy pedal feel' are serious brake efficiency issues. You can find our detailed recommendations on these below.
A. STEAM THROTTLE
Steam throttling, one of the most frightening and dangerous braking efficiency losses, is realted with brake fluid. Braking creates a significant amount of heat and brake fluid is designed to have a high boiling point to keep the brake fluid from boiling to these high temperatures. However, brake fluid is also hygroscopic, meaning it absorbs water. In every hydraulic brake system, the brake fluid gradually absorbs moisture, which lowers the boiling point of the brake fluid.
When this moisture absorption reaches a certain level and during prolonged hard braking, especially in hot weather and heavy loads, the heat can cause the brake fluid to boil and form gas bubbles. Because gas can be compressed much more than liquid, the driver does not feel any pressure on the brake pedal, which can cause a complete loss of braking power, known as steam throttling.
PREVENTION OF STEAM THROTTLE
1. SELECT THE RIGHT BRAKE FLUID
The brake fluid you choose to put in the hydraulic system is very important. Vehicle manufacturers recommend a particular type and this recommendation should always be followed. Of course, the quality of the brake fluid is very important.
Below you can see some spesifications for brake fluid:
• must be incompressible to provide firm pedaling during braking
• should have a high boiling point
• must maintain its performance during moisture absorption
• must have a fluidity that falls between precisely defined parameters
• must have the correct oil level
• should prevent corrosion
• there should be a controlled rubber swelling to prevent pinching.
2. TEST THE BRAKE FLUID
While many vehicle and brake manufacturers offer minimum recommendations, the right time to change brake fluid should not depend on the vehicle's mileage or age. The only real method is to test the brake fluid by boiling it. . Some points to keep in mind:

Conductivity or 'pencil type' testers do not boil the hydraulics. They electronically estimate the water content. In theory, conductivity (and/or resistance) increases with vapor content, but beware of the possibility that testers 'fail' new fluid and 'confirm' dirty hydraulics
3. REPLACE BRAKE FLUID
If the boiling point is too low, you should change the brake fluid. Below is our guide on draining the system to replace the hydraulics.
Warning: Before draining the system, perform a master cylinder leak pass test by installing a pressure gauge in the nearest caliper brake pipe.
A pressure of 50 bar should be applied to the system for 45 seconds, during which pressure loss should not be more than 4 bar. More dips indicate a problem with the master cylinder that needs attention. A second check can also be carried out, but at a lower pressure of 10 bar.
DRAIN OPERATION-VEHICLES WITH FRONT AND REAR DISC BRAKES
Always release the brakes in a specific order, starting with the brake caliper furthest from the master cylinder (left rear or right rear dependent eg left or right drive)
• With all the discharge nozzles closed, attach a discharge tube to the first caliper and loosen the nozzle.
• Continue using slow, full and firm strokes of the brake pedal until the brake fluid is visibly clean (in the drain pipe) and free of air bubbles. With the pedal fully depressed, tighten the drain nipple and remove the drain tube.
• Continue with the reverse rear wheel roller and repeat the procedure.
• After completing the rear wheel cylinders, make sure the front calipers are working properly and remove any air bubbles by draining the front calipers (starting with the furthest to the master cylinder and ending with the closest one).
• Finally, make sure that sufficient pedal pressure is achieved.

DRAIN OPERATION- VEHICLES WITH BRAKE DRUM
Always release the brakes in a specific order starting from the wheel point furthest from the master cylinder (left rear or right rear dependent eg left or right drive).
Before starting the unloading process, it is necessary to ensure that the correct manual adjustment of the brake shoes (if any) to the drum brake clearance is carried out according to the manufacturer's instructions.
• With all the discharge nozzles closed, attach a discharge tube to the discharge nozzle of the wheel cylinder furthest from the master cylinder and loosen the nozzle.
• Continue using slow, full and firm strokes of the brake pedal until the brake fluid is visibly clean (in the drain pipe) and free of air bubbles. With the pedal fully depressed, tighten the drain nipple and remove the drain tube.
• Continue with the reverse rear wheel roller and repeat the procedure.
• After completing the rear wheel cylinders, make sure the front calipers are working properly and remove any air bubbles by draining the front calipers (starting with the furthest to the master cylinder and ending with the closest one).
• Finally, make sure that sufficient pedal pressure is achieved.
B. SPONGY PEDAL FEEL
This is experienced when the brakes have a spongy pedal feel (softer than they should be) and excessive force is required to stop the vehicle.
WHAT CAUSES THE SOFT PEDAL FEEL AND HOW CAN YOU FIX IT?
Defective brake hoses can often cause brake fluid leakage or inflate the balloon itself, which means poor brake pedal response.
HOW TO AVOID DEFECTIVE BRAKE HOSES
1. AGING: inspect for chipping, cuts and general wear and leakage.
2. ASSEMBLY: make sure they are not bent or twisted, that the correct tightening torque is applied, and that there is no connection between the hoses and suspension components when the vehicle is lowered.
3. QUALITY: choose hoses with high resistance, good flexibility, low moisture permeability and low volume expansion under pressure.

